Content Query Web Part + Calendar = Mad Problems

I recently had to assemble a content query web part (my least favorite thing) pulling data from a Calendar list and experienced hours of pain trying to get it to pull the locations field as well as the start/end time consistently. I share my pain so that other won’t have to endure, and hopefully some tips so that you can skip all the BS and just make a quick web part that should have took about 30 minutes.

I had an extremely painful time working with the Location field for some reason. It would show on ctrl-f5 or the first load of the web part. Then disappear or show intermittently. It was basically unreliable until I used the ID and renamed the fields as described below.

Getting the fields right

Step 1 – Calendar list settings

If you go to the list settings and copy or inspect the link to the Start Time field you’ll see something like this.

/_layouts/15/FldEdit.aspx?List=%7BE84FD6F2%2D11AD%2D443B%2D84A2%2DA6E1B198458D%7D&Field=EventDate

This is good to give you what the field name is but we actually just want the field ID. Next I move up to the parent content type and click “Event”

image

In these columns I copy or inspect Start Time field again and you’ll see this

/_layouts/15/ManageContentTypeField.aspx?ctype=0x010200D536EDB0AB69A047B200ABF60FFE33EF&List=e84fd6f2-11ad-443b-84a2-a6e1b198458d&Field=EventDate&Fid=%7B64cd368d%2D2f95%2D4bfc%2Da1f9%2D8d4324ecb007%7D

This is what I want – I’ll get the actual field ID. using a url decoder [http://meyerweb.com/eric/tools/dencoder/]

Fid=%7B64cd368d%2D2f95%2D4bfc%2Da1f9%2D8d4324ecb007%7D

Fid={64cd368d-2f95-4bfc-a1f9-8d4324ecb007}

Step 2 – Content Query

Once you’ve exported the content query so we can edit it in notepad, search for CommonViewFields

Add the Start Time field to this property

<property name=”CommonViewFields” type=”string”>{64cd368d-2f95-4bfc-a1f9-8d4324ecb007},DateTime;</property>

Next search for DataColumnRenames, add the following. The EventStartDateTime is what you would use in the xslt to pull this property. You can call it what you like at this point.

<property name=”DataColumnRenames” type=”string”>{64cd368d-2f95-4bfc-a1f9-8d4324ecb007},EventStartDateTime;</property>

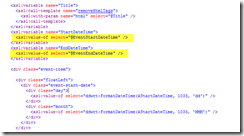
Below is a snippet of me using the EventStartDateTime in my xslt. I’m assigning it to a variable to i can further manipulate it.

image

Step 3 – Repeat

You can repeat the following steps for a fool proof method of getting the fields you want into your content query web part. If you use the column ID and rename it you should have no issues.


Location Field

{288f5f32-8462-4175-8f09-dd7ba29359a9},Text;

Start Time

{64cd368d-2f95-4bfc-a1f9-8d4324ecb007},DateTime;

End Time

{2684f9f2-54be-429f-ba06-76754fc056bf},DateTime;


<property name=”CommonViewFields” type=”string”>{288f5f32-8462-4175-8f09-dd7ba29359a9},Text;{64cd368d-2f95-4bfc-a1f9-8d4324ecb007},DateTime;{2684f9f2-54be-429f-ba06-76754fc056bf},DateTime;</property>

<property name=”DataColumnRenames” type=”string”>{2684f9f2-54be-429f-ba06-76754fc056bf},EventEndDateTime;{288f5f32-8462-4175-8f09-dd7ba29359a9},EventLocation;{64cd368d-2f95-4bfc-a1f9-8d4324ecb007},EventStartDateTime;</property>


Troubleshooting

From this day forward I vowed to always include this debugging template in my ItemStyle.xsl. It will basically just dump the raw data to your screen, so you can see what fields you have

   1: <xsl:template name="DisplayRawData" match="Row[@Style='DisplayRawData']" mode="itemstyle">

   2:   <xsl:for-each select="@*">

   3:     <xsl:value-of select="name()"/>

   4:     <xsl:text> = </xsl:text>

   5:     <xsl:value-of select="."/>

   6:     <br/>

   7:   </xsl:for-each>

   8:   <br/>

   9:   <br/>

  10:   <br/>

  11: </xsl:template>

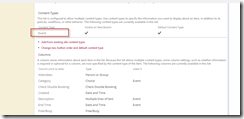
If you set the Item style: DisplayRawData, you’ll get a dump of the fields and values that are available. In the screen shot below you’ll notice then fields that we’ve renamed and they data
image

Using SPServices and Pagination to create a photo gallery

In this positing I’m going to cover utilizing the SPServices codeplex project to build a “Gallery” of sorts. In this demo we’ll be creating a picture gallery but ideally this code be used for any content. The main focus of this article is how to take advantage of the paging capability of the list web service. I found this to be a sparsely document capability and this demo might enlighten some people on how to use it.

Some of you might say, “What’s the point of this. There are so many jQuery galleries and quite frankly they look better!”

Well very true they do look better, and they might even have pagination. The problem with those is that you might have to load all the data on the page before it could perform its magic. This demo will only load the 6 items at a time, and this technique could be used on any type of object that needs pagination, and it’s more of a real world example of how to use the SPServices to make list web services calls using the CAML options for paging.

With all that said, let’s get started. Just want the files? Download the CEWP & gallery.js here

Pre-Requisites:

Download SPServices, and jQuery store them in a folder on your SharePoint site. I’m using SPServices 0.6.0 & jQuery 1.5.1

  1. First I’ve created an image gallery called – “Gallery”
  2. Add more than 6 pictures to this library.
  3. Next edit the page and pop in a Content Editor Web Part, add in your script references.

** gallery.js is the name of our script file that we will be making **

  1. Next add in the HTML structure that we’ll need.

  1. Lastly lets add just a touch of style

Attached is the gallery.js, upload that where your other javascript files are and make sure the reference in step 3 is correct.

Let’s take a look at the gallery.js to explain what its doing as well as show you what you can configure. I’ll be jumping around the script but I’m leaving the line numbers in there so you know where I am.

The rowLimit is the number of items to display per page, The list is the name of your List, and the query can be configure at the top of the script. (this can be expanded out to have a selected rowLimit or filters)

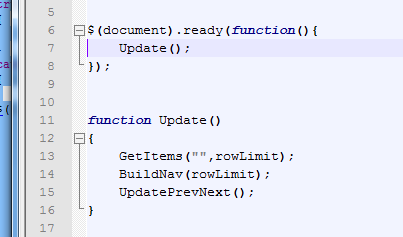
The following starts the creation of the gallery. Its contained in a function called Update(). Update will call the three functions to build the gallery. GetItems -> BuildNav -> UpdatePrevNext

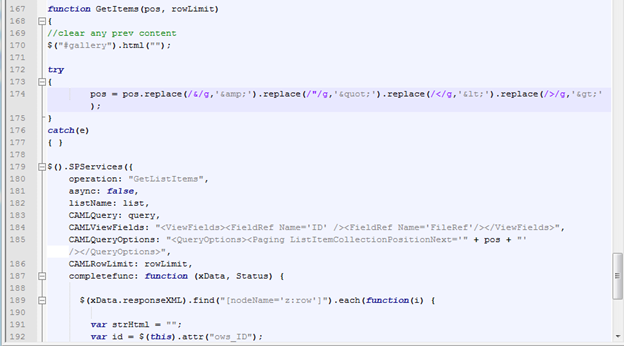
This GetItems() function takes a position and a row limit and displays that set of items. The output of the items can be modified inside the $(xData.responseXML).find(“[nodeName=’z:row’]”).each(function(i) { });

Next function BuildNav() builds out the navigation, it does this by making repetive calls to the web service with the row limit and the next position. In terms of performance, the more items you have and the smaller the row limit, then the more web service calls will be made. The less items and higher row limit, then the less web service calls will be made. This section also builds out the initial Prev & Next links.

In line 156 above the build nav will call GetNextPos and it will feed it the current position with a row limit in order for it to return the next position in the pagination

Lastly the script binds to the click events of the pagers, previous and next buttons.

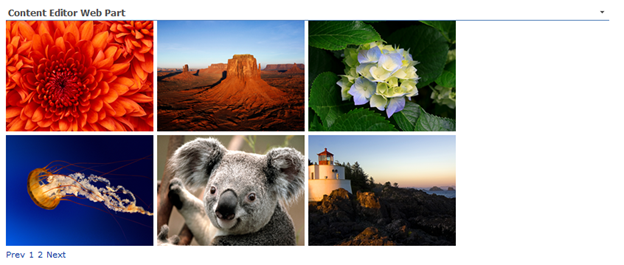
So that’s it .. The finished product. A jQuery type solution to creating a paginated gallery type widget.

Download the CEWP & gallery.js here

How can i get the current time in my data view web part

I’m posting this in case anyone is looking to easily get the time from your SharePoint server through the data view webpart. This will give you the hour, minute, second in the 24 hour format
 
The same approach could be used if you needed to gather the date in day, month, year.
<span class="hour"><xsl:value-of select="substring-before(substring-after(string(ddwrt:TodayIso()),'T'),':')"></xsl:value-of> </span>  
<span class="minute"><xsl:value-of select="substring-before(substring-after(substring-after(string(ddwrt:TodayIso()),'T'),':'),':')"></xsl:value-of> </span>  
<span class="hour"><xsl:value-of select="substring-before(substring-after(substring-after(substring-after(string(ddwrt:TodayIso()),'T'),':'),':'),'Z')"></xsl:value-of></span>